
Moving a website to a new server can make it faster, provide more hosting resources, and give you better control over your website. If you move your website without proper planning, some pages may stop working, files may go missing, and you may face database or email problems. It can also affect your SEO temporarily.
To avoid these problems, first back up your website. Then, transfer your website files and database to the new server and check that everything works correctly. Once everything is ready, update your DNS records to point to the new server.
This guide helps you move your website—whether it’s a business site, online store, or WordPress blog—to a new server. You’ll face less downtime and keep your SEO efforts safe.
What Does Website Migration Mean?
Website migration is moving a website from one server to another. It involves moving files, databases, settings, email services, and other site resources.
For example, a business in Dubai might shift from shared hosting to a VPS for more resources or better control.
Migration doesn’t always involve changing your domain name. If the domain stays the same and only the server changes, it usually makes migration easier for SEO.
Common Types of Website Migration
- Server migration: Moving a website to a different physical or virtual server.
- Hosting migration: Changing hosting providers while keeping the same website and domain.
- WordPress Migration: Moving a WordPress site. This includes its files, database, themes, plugins, and settings.
- Domain migration: Moving a website to a new domain name.
- Platform migration: Moving from one content management system or website platform to another.
This guide focuses primarily on server and hosting migration. Domain and platform changes may require additional SEO and technical steps.
What Should You Prepare Before Migrating a Website?
Check that the new hosting environment can support all your website’s needs before moving it.
1. Choose a Suitable Hosting Environment
Compare the available hosting plans based on your website’s actual requirements.
Consider the following:
- Storage capacity and available bandwidth.
- Supported PHP version, database software, and other runtime requirements.
- CPU, memory, and resource limits.
- SSL certificate availability.
- Backup and restoration options.
- Security features and server access.
- Technical support and expected uptime.
A hosting plan for a small business site might not fit a large WooCommerce store. This is especially true if the store has many orders and high traffic.
2. Check Your Existing Website Configuration
Record the technical details of your current website before making changes.
For a WordPress site, check the:
- PHP version
- Database type
- WordPress version
- Installed plugins
- Theme
- Permalink structure
- Custom code
Also, find out if the site uses cron jobs, external APIs, caching services, or third-party integrations.
These details help you identify compatibility problems before they affect the live website.
3. Back Up Your Website Files and Database
A complete backup is essential before migration.
Website files may include images, themes, plugins, scripts, configuration files, and uploaded documents. The database can hold pages, posts, user accounts, product info, orders, settings, and other dynamic content.
You can generally back up your files through your hosting control panel or an FTP/SFTP client. If your website uses MySQL or MariaDB, you can often export its database. You can do this using phpMyAdmin or a command-line tool.
Keep a copy of the backup somewhere separate from both servers. If possible, verify that the backup can be restored before proceeding.
Important: A website backup is not complete simply because you downloaded a folder. For database-driven websites, you normally need both the files and the database.
How to Migrate a Website from One Server to Another: Step-by-Step
The following process is suitable for many PHP-based and database-driven websites. Exact instructions depend on your hosting provider, website platform, and server configuration.
Step 1: Set Up the New Server
Purchase or configure the new hosting plan and add your existing domain to the new hosting account.
Set up the website’s document root. Configure the needed runtime environment. Prepare a database if your website requires one.
For a WordPress website, confirm that the new server meets the requirements of your WordPress version, theme, and plugins. Configure the required PHP extensions and database access.
Do not change your domain’s DNS records yet. Your existing website should remain available while you prepare and test the new version.
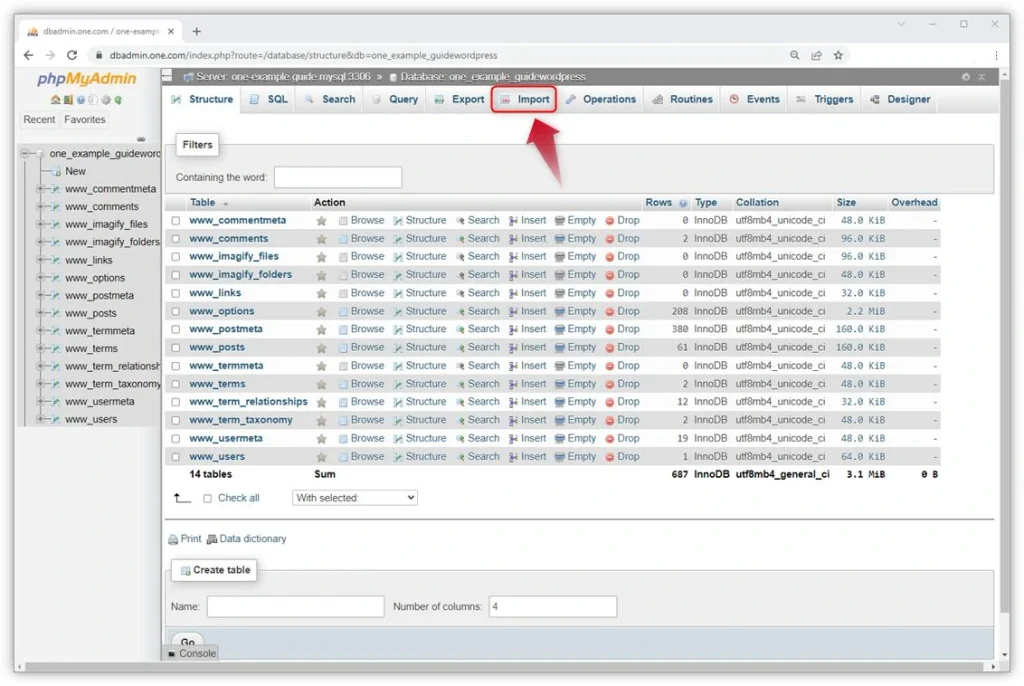
Step 2: Transfer Your Website Files
Download or copy the website files from the old server.
Depending on your hosting environment, you can use:
- The hosting control panel’s File Manager.
- An FTP or SFTP client.
- SSH and secure file-transfer tools.
- A migration tool supplied by your hosting provider.
Upload the files to the correct directory on the new server. In many shared-hosting environments, this is a directory such as public_html, but the exact location varies.
Make sure hidden files are included when necessary. Files such as .htaccess can contain important rewrite rules, redirects, and access settings.
After uploading, check that the directory structure is right. Also, make sure file permissions let the web server read the needed files, but keep sensitive files from being publicly writable.
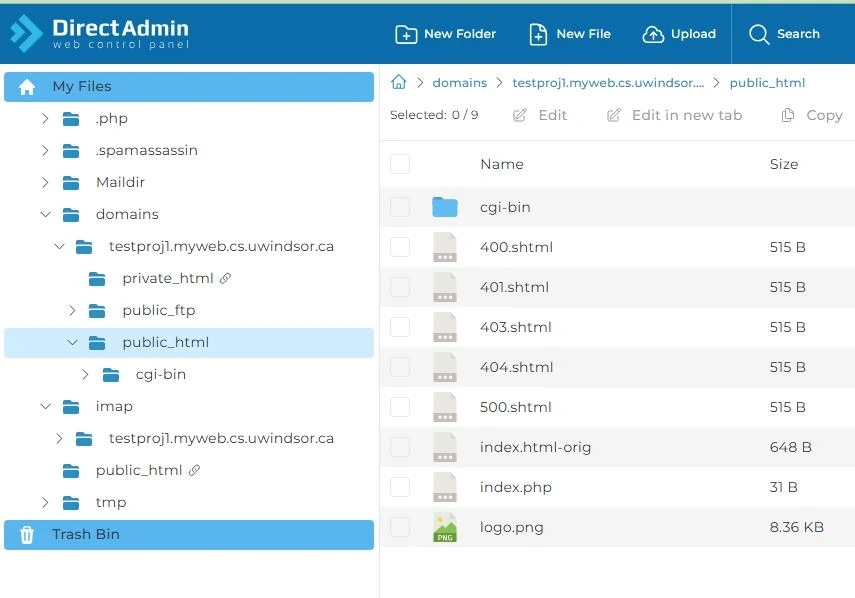
Step 3: Export and Import the Database
If your website uses a database, you must transfer that data as well.
On the old server:
- Open the database management tool, such as phpMyAdmin.
- Select the database used by your website.
- Export the database, usually as an SQL file.
- Store the exported file securely.
On the new server:
- Create a new database and database user.
- Grant the user the necessary permissions.
- Open the new database in phpMyAdmin or another supported tool.
- Import the SQL backup.
- Confirm that the expected tables and records are present.
Large databases may require a command-line import or a specific migration method. This is especially true if the web interface limits uploads or execution.
Never overwrite a production database without checking the destination and keeping a backup.
Step 4: Update the Website Configuration
The website must connect to the correct resources on the new server.
For WordPress, open the wp-config.php file and check the database configuration values:
define(‘DB_NAME’, ‘new_database_name’);
define(‘DB_USER’, ‘new_database_user’);
define(‘DB_PASSWORD’, ‘your_database_password’);
define(‘DB_HOST’, ‘your_database_host’);
Use the actual values supplied by your new hosting provider. The database host is not always localhost.
Keep credentials private. Don’t put real passwords in public documents or unsecured files.
If the domain remains unchanged, you may not need to replace your website URLs. If you are also changing the domain or directory, additional URL updates may be necessary. For WordPress, use a migration-aware tool or the WP-CLI search-and-replace command. This keeps serialized data safe instead of blindly replacing text in the database.
Step 5: Test the Website Before Changing DNS
This step is often overlooked, but it can prevent avoidable downtime.
Preview the migrated website. You can use a staging URL, a hosting preview feature, or a temporary local hosts-file entry to direct your domain to the new server. The method you can use depends on your hosting provider and server setup.
Check the following:
- Homepage and important landing pages load correctly.
- Images, CSS, JavaScript, and downloadable files work correctly. You should also optimize website images to help improve page loading speed.
- Forms submit successfully.
- Login and admin pages are accessible.
- Internal links and navigation work.
- Search, filters, and interactive features function correctly.
- Database-driven pages display the correct content.
- SSL and HTTPS work as expected.
- No unexpected PHP errors or missing-file messages appear.
For an online store, check these: product pages, cart, checkout, payment options, order alerts, and inventory updates.. Use the right test environment for these tasks.
If the new version fails these checks, fix the problems before directing visitors to it.
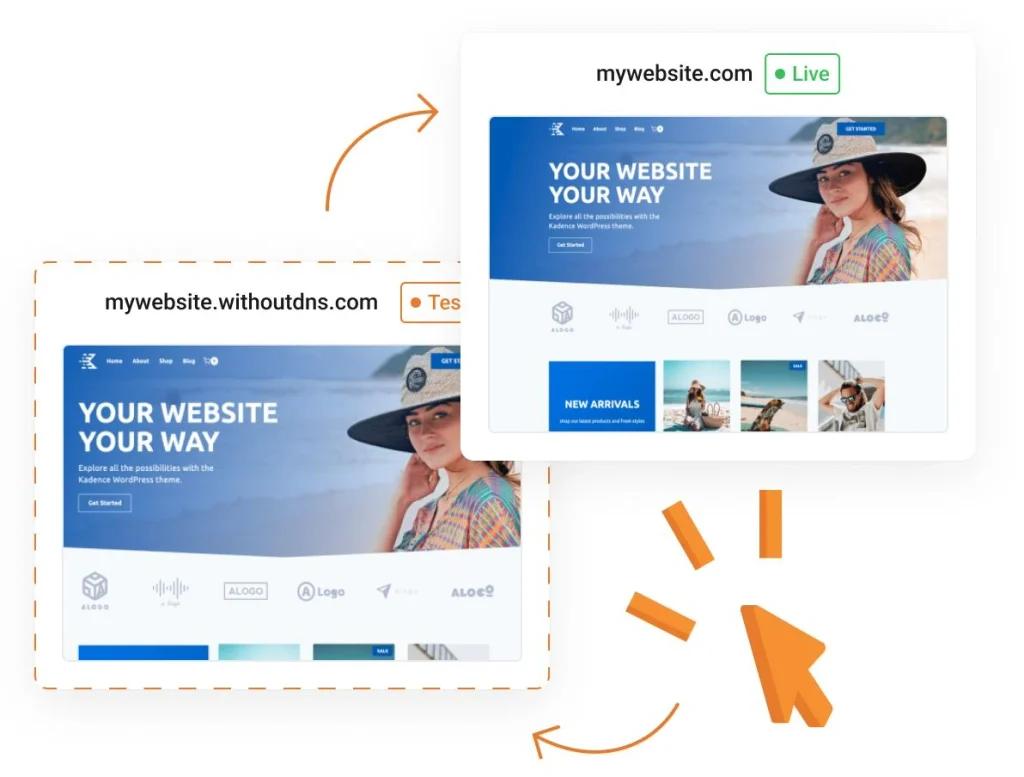
Step 6: Update Your DNS Records
Once the new website is ready, update the DNS records that direct visitors to your hosting server.
For a typical website, the main change may involve the domain’s A record, which points the domain to an IPv4 address. An AAAA record may be used for IPv6, and the www hostname may use a CNAME or another suitable record.
If you use a DNS provider, CDN, or proxy service, change settings in the right DNS dashboard. Don’t assume your hosting provider controls them.
You do not necessarily need to change your nameservers. If the existing DNS provider will remain responsible for your records, you may only need to update the relevant records.
Lowering the DNS TTL in advance can help some DNS changes take effect more quickly, but it does not guarantee immediate propagation. Visitors may continue reaching the old server temporarily because of caching.
Keep the old hosting account available during this period.
Step 7: Configure SSL, Redirects, and Server Settings
After the DNS changes begin taking effect, confirm that the website loads correctly over HTTPS.
Install or activate the appropriate SSL certificate on the new server. Check that HTTP requests redirect to the preferred HTTPS version and that your canonical URLs remain correct.
Also review:
- URL rewrite rules and permalink settings.
- PHP and application error logs.
- Caching and CDN configuration.
- Firewall rules and security settings.
- Website Security Checks.
- Scheduled tasks and background jobs.
- SMTP settings and contact form delivery.
- Website integrations that depend on the server’s IP address.
For WordPress, go to Settings → Permalinks. Save the current permalink settings to refresh rewrite rules if needed.Do not change the URL structure unnecessarily.
Step 8: Monitor the Website After Migration
Do not consider the migration complete immediately after the homepage loads.
Check server logs, website uptime, form submissions, error rates, performance, and key user paths.
For WordPress websites, check the admin dashboard for plugin errors and confirm that scheduled tasks are running. For online stores, verify that new orders and customer records are being saved to the correct database.
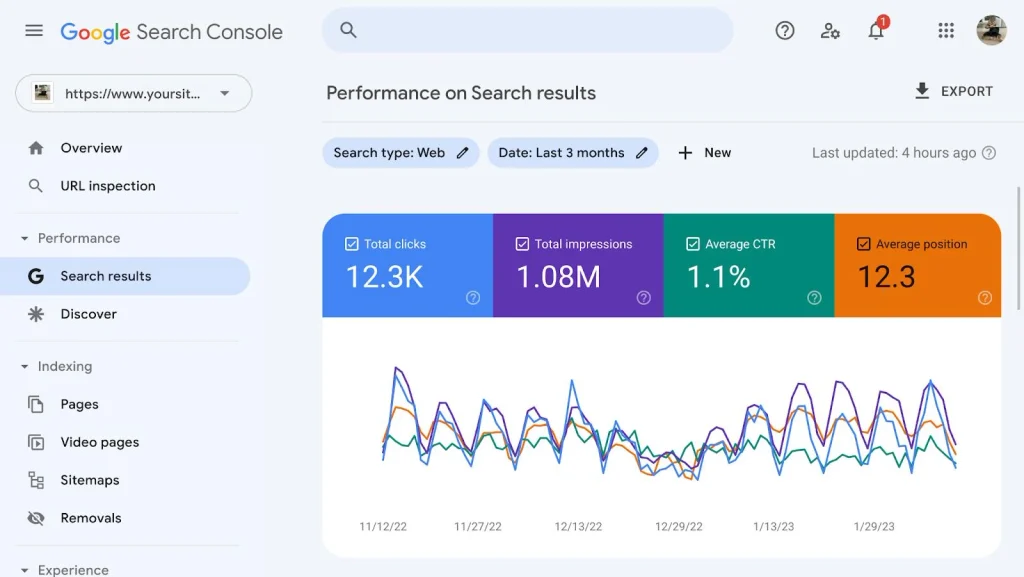
Use Google Search Console to check indexing reports, crawl errors, and search performance as needed.
Keep the old server running until you confirm the new website is stable and finish any final data sync.
How to Migrate a WordPress Website
If you want to migrate a WordPress website, you can use a manual method or a migration plugin.
Option 1: Manual WordPress Migration
A manual migration gives you more control over the transfer process.
The main steps are:
- Back up the WordPress files and database.
- Upload the files to the new server.
- Create a database and import the old database backup.
- Update the database credentials in wp-config.php.
- Preview and test the website.
- Update DNS records when the new version is ready.
- Check HTTPS, permalinks, forms, plugins, and website functionality.
The official WordPress migration documentation lists the main steps to move a WordPress site.
Option 2: Use a WordPress Migration Plugin
A migration plugin simplifies the process. It packages website files and database content into an export for easy import on the new site.
The general workflow involves creating a backup or migration package. Then, install the migration tool on the destination site. Next, import the package and follow the tool’s instructions to finish the transfer.
Before choosing a plugin, check its compatibility with your WordPress version. Also, verify hosting limits, file size restrictions, and available restore features.
Large websites may exceed upload limits or require a paid extension. A migration plugin also does not eliminate the need to test the website, verify DNS settings, or check email and external integrations.
Manual Migration vs. Migration Plugin
| Factor | Manual migration | Migration plugin |
| Technical knowledge | Usually higher | Often lower |
| Control over files and database | Detailed control | Depends on the plugin |
| Large websites | Flexible with suitable server access | May face package or upload limits |
| Troubleshooting | Requires technical investigation | Depends on plugin support and logs |
| Best suited for | Developers and advanced users | Many small and medium WordPress sites |
Neither method is universally better. Pick the method that suits your website’s size, access rights, tech skills, and hosting setup.
Website Migration SEO Checklist
A server migration does not automatically require a change to your URLs. If the domain, page paths, content, and canonical URLs stay the same, SEO work usually aims to keep the site accessible and technically sound.
Use this website migration SEO checklist to identify potential problems before and after the move.
Before Migration
- Record your important landing pages and their current URLs.
- Save a copy of your XML sitemap.
- Review your robots.txt file and existing indexing settings.
- Back up your website files and database.
- Record important redirects and canonical tags.
- Check that the new server supports HTTPS and the required application settings.
- Prepare a test environment for the new website.
During Migration
- Keep the existing URL structure whenever possible.
- Make sure important pages return the correct HTTP status codes.
- Check that robots.txt does not accidentally block search engines.
- Confirm that canonical tags point to the intended URLs.
- Check internal links, images, and structured data.
- Verify that the new server is accessible to search-engine crawlers.
- Avoid making unrelated content or URL changes during the move.
After Migration
- Test the homepage and priority landing pages.
- Check HTTPS, redirects, and canonical tags.
- Confirm that the XML sitemap is accessible.
- Review Google Search Console for crawl and indexing problems.
- Monitor organic traffic, impressions, clicks, and indexed pages.
- Check server logs for repeated 404, 403, and 5xx responses.
- Keep the old server available until the migration is stable.
If you’re changing your domain name: Create a URL map from old to new pages. Set up permanent redirects, update canonical URLs, and adjust internal links. Also, check Google’s site move guidance. Domain changes require more SEO work than a server move that keeps all URLs the same.
Common Website Migration Mistakes to Avoid
Even if the file and database transfer goes smoothly, small setup errors can still make the website malfunction.
Forgetting the Database
Just copying the website files isn’t enough for most WordPress and other database-driven sites. Without the correct database, pages, settings, products, and other content may be unavailable.
Changing DNS Before Testing
Switching visitors to an untested server can expose them to broken pages, database errors, or an incomplete website. Preview and test the destination first.
Overlooking Email and DNS Records
Website hosting and email hosting do not always use the same provider. Changing nameservers without saving MX, SPF, DKIM, DMARC, and other key DNS records can disrupt business email.
Review all existing DNS records before making nameserver changes.
Ignoring File Permissions and Server Compatibility
Errors can occur after migration due to:
- Incorrect file permissions
- Unsupported PHP versions
- Missing extensions
- Incompatible server rules
Check the error logs. Make sure the new environment meets your application’s needs.
Deleting the Old Hosting Account Too Soon
Keep the old hosting account active. This gives you time to check if the new version is stable. You can also recover any missing files or data if needed.
Don’t delete the old account until you confirm the migration, backups, email setup, and final data sync.
When Should You Hire a Website Migration Service?
A website migration service is essential for critical sites, large databases, custom servers, or when downtime must be minimal.
Professional help is also valuable for WooCommerce stores, membership sites, booking platforms, and those using external services.
Before choosing a provider, ask about their backup and rollback methods, staging setups, DNS coordination, database sync, security practices, post-migration testing, and support options.
For businesses in Dubai and the UAE, the best migration method depends on the site’s complexity, hosting needs, and the potential impact on customers.
A migration service should clarify what’s included, not just promise a transfer. Check if email migration, DNS setup, SSL installation, performance testing, and SEO checks are part of the service.
Frequently Asked Questions
1. How long does it take to migrate a website to another server?
The time required depends on the website’s size, database, server access, and complexity.A small static website can be moved quickly. However, a large online store or custom app needs more prep, testing, and data sync.
DNS changes can take additional time to become visible across different networks.
2. Can I migrate my website without downtime?
You can often cut downtime by preparing the destination server first. Test the website before switching DNS. Also, keep the old server running during the transition.
However, uninterrupted service cannot be guaranteed in every environment. Dynamic websites might need a maintenance window or final database sync to prevent losing new orders or user submissions.
3. Will changing servers affect my website’s SEO?
Changing servers alone does not require a change to your domain or URLs.
The main priority is to keep the website accessible. We must preserve its content and URL structure. We also need to avoid technical problems that can interfere with crawling or indexing.
If the migration includes a domain change, URL restructuring, or extended downtime, we need extra SEO precautions.
4. Do I need to transfer my domain name when changing hosting providers?
No. Your domain registration and website hosting are separate services. You can keep your domain with your current registrar and update the relevant DNS records to point to the new hosting server.
Transferring the domain registration is optional and is not normally required for a server migration.
5. What files do I need to migrate a WordPress website?
You need the WordPress files, such as themes, plugins, uploads, and configuration files, plus a full database backup.
You might need to redo server settings, scheduled tasks, email setups, and other integrations from the original site.
6. Should I change my nameservers or only the A record?
That depends on where your DNS is managed. If your DNS provider stays the same, you might only need to update the A record and any related records that rely on the old server.
If you are moving DNS management to a new provider, you may need to change the nameservers and recreate all necessary DNS records first.
7. What should I do if my website shows a blank page after migration?
Start by checking the server’s PHP or application error logs. Next, verify the database credentials, PHP version, required extensions, file permissions, document root, and server setup.
For WordPress, temporarily disabling a problematic plugin in a safe troubleshooting process may help identify the cause. Also confirm that the website files and database were transferred completely.
8. Can I migrate a website myself, or should I hire a professional?
A small website with simple hosting needs can often be moved by its owner if they know about backups, databases, file transfers, and DNS settings.
A professional website migration service is smart for sites that handle customer transactions, have complex server needs, or need a smooth transition with a backup plan.